It is a dynamic accumulator that improves your soil, prevents disease and provides free mulch for your plants as well as livestock fodder. Comfrey is also a powerful compost activator and will get your compost pile off to a quick start.
Do you have a plant in your garden that gives free mulch, compost activator, and a potent plant food? The plant is Russian Comfrey. It has long taproots that harvest nutrients from deep within the ground. The dynamic accumulation of minerals and nutrients is what makes comfrey leaves an excellent natural source of nitrogen, phosphorus, and potassium. The NPK ratio of comfrey leaves is 1.8-0.5-5.3. Comfrey is also rich in calcium and many other valuable plant minerals it mines from deep in the subsoil.
Here are some ways that you can Harness the Power of Comfrey
Mulch. Freshly cut comfrey leaves make good mulch because they're high in nitrogen, so they don't pull nitrogen from the soil while decomposing, as high-carbon mulches like straw and leaves do. And comfrey's high potassium content makes it especially beneficial for flowers, vegetables (such as tomatoes, peppers, and cucumbers), berries, and fruit trees.
Soil amendment. Use freshly cut comfrey leaves (but not the flowering stems in this case—they can root) as fertilizer in planting holes. The leaves break down rapidly and provide nutrients right at the roots.
Compost activator. Comfrey is especially useful if you have lots of dry brown material and the pile is slow to heat up. Just layer the fresh comfrey leaves and stems in as you add other material to your pile.leaves and stems in as you add other material to your pile.
Liquid fertilizer. One of the best ways to tap your fertilizer factory is to brew comfrey tea. Fill a barrel or trash can about halfway with fresh comfrey, add water, cover it, and let it steep for 3 to 6 weeks. Comfrey tea smells foul, so brew it away from sensitive noses (yours or your neighbors). The tea may be used full strength or diluted to about half strength—to the color of weak tea. Use it whenever you water your plants. It's great for watering stressed plants to help get them back on track.
You can also make liquid fertilizer concentrate by packing fresh-cut comfrey tops into an old bucket, weighing them down with a big rock or a plastic bag of water, covering tightly, and waiting a few weeks for them to decompose into a lovely thick black goo. Some gardeners put a hole in the bottom of the bucket and collect the concentrate in another container as it drips out. Dilute this comfrey concentrate about 15 to 1 with water, and use as you would comfrey tea. You can seal this concentrate in plastic jugs until you are ready to use it.
Pest prevention and control. Scientists at Moscow State University in Russia observed that powdery mildew spores that landed on wheat seedlings sprayed with comfrey tea did not germinate, and the wheat seedlings did not become infected. The researchers concluded that the comfrey tea sprays had activated natural defense mechanisms in the wheat seedlings, making them more resistant to disease.
To use comfrey tea or diluted comfrey extract as a foliar drench or spray, add a few drops of liquid soap (it helps the spray stick to leaves) and apply it to your plants. You can use a watering can with a fine rose, but you'll get better coverage with a garden sprayer. Be sure to strain yourliquid very carefully (let it drip through a large coffee filter) before you put it in your sprayer, or you'll clog up the nozzle before you even get started. When you spray your plants, don't coat just the tops of the leaves; reach under and spray the bottoms, too, at least until the liquid starts to run off.
Easy to Grow
If you're not yet ready to put comfrey to work in your garden, wait until you find out how little it expects from you. Russian comfrey is a hardy perennial (USDA Plant Hardiness Zones 3 to 9) with large, hairy leaves; long, fleshy roots; and clusters of small cream, pink, or blue flowers. Unharvested plants grow to about 3 feet tall and wide. Comfrey spreads rather enthusiastically both by self-seeding and sprouting from even small sections of severed root. You can prevent this by planting only sterile cultivars such as 'Bocking 14' and not digging or cultivating around your comfrey. Comfrey grows best in full sun or partial shade. It thrives in clay soil with plenty of moisture but tolerates a wide range of conditions. Once established, it is difficult to get rid of, so choose a site where it can stay. Six plants is enough for most gardeners, which means allowing a planting space of about 6 by 10 feet or 3 by 20 feet. Don't plant comfrey in any area you cultivate, as breaking off bits of root will create oodles of new plants. Remove any perennial weeds in the bed. Plant root cuttings or plants about 3 feet apart either in spring or fall, and keep the soil moist until plants are well established. Don't harvest the first year, and cut off any flower stalks that form, as your plants need to establish a good root system.
If you have a small yard or you're concerned about comfrey taking over your garden, grow it in large trash cans. Just cut drainage holes in the bottom of each can, fill with a soil and compost mix, and plant.
Comfrey produces huge quantities of leaves during the growing season (4 to 5 pounds per plant per cutting) and will happily soak up any nitrogen-rich fertilizer it's given, though it grows just fine without extra feeding.
'Bocking 14' Russian comfrey is sterile but individual plants will expand, so divide them every few years if your patch is getting crowded. Don't even dig them up; just slice through each one with a sharp spade while its in the ground. Replant the sections you remove or share them with friends, but don't put the roots in your compost pile, or you'll have comfrey plants popping up everywhere next year.
Harvesting
Comfrey is ready to harvest when it is about 2 feet tall or starts to form flower stalks. Depending on your climate, you will probably get four or more harvests a year. Cut off the whole plant about 2 inches above the ground with pruners or a sickle. Be sure to wear gloves and long sleeves when harvesting comfrey, as some people find it irritates their skin. After harvesting, give your comfrey a good watering and renew the mulch layer.
I was listening the The Survival Podcast today and caught wind of this gem from Erica over at nwedible.com. Comfrey is an amazing plant with many uses you should add some to your landscape...no matter where you live!
DIY Sunburn Soothing Comfrey Cubes
by Erica
When I was nine, my parents took my younger sister and me to Disneyland. It was the kind of vacation every little girl dreams of – Main Street Parade, Sleeping Beauty’s Castle, pictures with Minnie Mouse, and a teeth-rotting amount of cotton candy.
I know, because there is visual proof of all these activities, carefully organized across my mother’s photo albums. But what do I really remember? What single thing from the vacation made that deep, visceral, never-going-to-forget-this impact that changes a kid’s life?
My sunburn.
I’ve been a Northwest girl for longer than I’ve been able to walk, and that California, Disneyland summer sun fried me to a crisp. Even slathered in SPF 10, or whatever skin protection was top-of-the-line in the mid-80s, over the course of a long day of cartoon idol-worship, I turned from my natural just-this-side-of-albinism pinkish pallor to bright scarlet. (If you are nerdy, think #FFFAF0 to #FE2E2E.)
I remember so clearly lying face down on the polyester bedspread of our hotel room. It was black with a Hawaiian flower motif. The bedspread looked shiny and smooth but any touch against my shoulders, chest, arms, or the tops of my feet was like a kiss from the cat o’ nine tails. Even weeks later, I was peeling patches of dead skin off the sunburnt areas.
That experience fused a conviction in my young mind: sun = evil.
And so, for the better part of 15 years, I hardly went outside. I’m not exaggerating. I didn’t play sports, I didn’t go camping, I didn’t hang out at the beach, and I sure as hell didn’t “tan”. In high school, while all the pretty girls got punch cards for strip mall tanning salons, I embraced my naturally porcelain skin as a statement. By this point I was watching My So-Called Life and Daria. I was wearing Dr. Martins and thought Ally Sheedy was cooler when she was wearing glasses and decorating her pictures with dandruff. The whole goth-look skin was part of the package.
Everything might have continued along this way had I not become a gardener and a mom. Now, between planting, playing, harvesting, weeding, and time at the park or beach, I spend a lot of time outside. I still try to cover up, hug the shady spots and stick to the cooler hours of the day, but my knee-jerk reaction to avoid the sun at all costs has changed.
My skin, unfortunately, has not.
Walking my son home from school yesterday (a 20 minute walk even at kid pace) led to a fairly painful sunburn across my shoulders. Luckily, I had a stash of Comfrey Cubes in the freezer.
Skin Soothing Comfrey Cubes
These cubes are my top pick for DIY emergency skin care. Comfrey (yes, the same plant that permies never shut up about. Just kidding, love you guys.) is phenomenally useful for skin care because it’s a rich source of allantoin, a compound that helps skin regenerate, soften, and recover from damage.
Allantoin is quite amazing. Wisegeek sums it up well:
Allantoin is odorless, safe, non-toxic, and non-allergenic in both natural and chemically synthesized form. When sold on its own for use in homemade soaps, lotions, and bath products, allantoin is a white, crystalline powder. It is moisturizing and keratolytic, meaning that it causes keratin in the skin to soften. This property helps skin to heal more quickly and to bind moisture more effectively, making products containing this substance useful for dry skin and for healing wounds, burns, and scars. It is also effective against sunburn, chapped lips, cold sores, diaper rash, and similar skin irritations.
Because of all that allantoiny goodness, these Comfrey cubes are useful for sunburns, regular burns, rashes, abrasions – pretty much any kind of non-puncturing skin damage. Every home should keep a stash on hand.
In my neck of the woods, comfrey is a common weed. When I need some, I just walk across the street and dig. The thick, fleshy roots are what we are after for the Comfrey Cubes, but the leaves are very useful in herbalism too.
Familiarize yourself with this under-appreciated medicinal herb and you may start to see it everywhere, too. If you live someplace where comfrey isn’t available wild, you can substitute 1 oz of dried comfrey root, available online, for the fresh.
This recipe for Comfrey Cubes is from my book, The Hands-on Home. If you like this kind of thing, you should go pre-order my book right now! Actually, seriously, if you’re a regular reader and you are planning on buying the book anyway, my publishers tell me that good pre-order numbers really help convince book sellers to carry the book. Thank you for considering!
An allantoin-rich skin soother, these Comfrey Cubes are useful for sunburns, regular burns, rashes, abrasions, skin softening and healing. If fresh comfrey is unavailable, 1 oz. of dried comfrey root may be substituted. For external use only, do not take internally.
Ingredients
4 oz. fresh comfrey root
3 cups water
Instructions
Very thoroughly scrub the comfrey roots, then chop them finely, by hand or in a food processor. Add the chopped comfrey root and the water to a medium saucepan. Bring to the barest simmer over medium-low heat, and maintain that temperature for 30 minutes. Remove comfrey gel from the heat, cover, and let cool completely, about 2 hours.
When the comfrey gel has cooled, strain it through a very fine mesh strainer. It will be brownish and highly mucilaginous (goopy) - this is normal. Use a spatula to push as much of the comfrey mix through the strainer as possible without getting any root bits in the finished gel. You should have about 2 cups of comfrey gel when you are done.
If you have a sunburn you can smooth a small amount of the comfrey gel right on your skin. To save the gel for later use, pour the cool comfrey gel into an ice cube tray (I use silicone trays like these) and freeze.
When the comfrey cubes are frozen solid, transfer them to a freezer safe plastic bag, label the cubes so everyone knows they aren’t edible, and keep frozen.
To use, rub a frozen Comfrey Cube directly onto sunburned skin.
3.2.2925
Two words of warning
Any time you wildcraft (harvest medicinals or edibles from the wild) you must be absolutely, 100% certain of your plant identification. If you are uncertain, find an experienced herbalist who can show you what to look for before embarking on the wonderful adventure of wildcrafting.
Comfrey root is not for internal use. There are compounds in comfrey that can cause liver failure if taken in large doses internally. If you have any concerns about limited, external use of comfrey decoctions, talk to a qualified herbalist or doctor before using this gel.
You know what a keystone is, other than a bad beer and a bad pipeline? It's the special wedge-shaped center stone in an archway. The integrity of the arch depends on the keystone transferring the stress of a load out and down through the rest of the arch and, ultimately,…
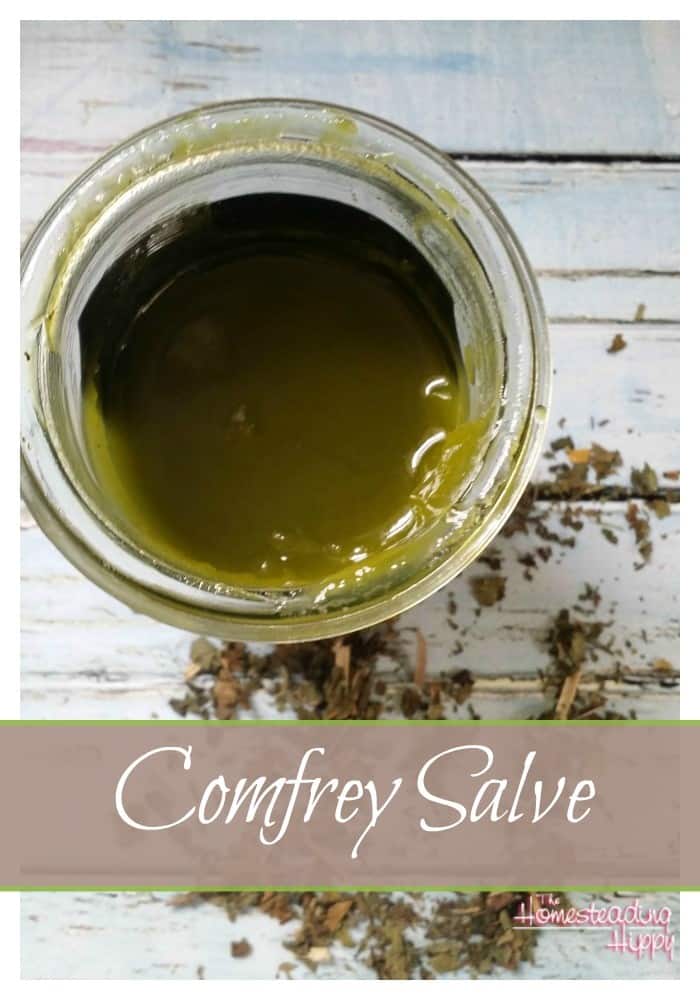
Comfrey is an amazing herb. It has anti-inflammatory, analgesic and
decongestant properties that make it a must have for many home herbal
apothecaries.
I like to have it as a salve to use on bumps and bruises, and to
help soothe pain from sprained wrists and ankles. With kids in
taekwondo, and a busy homestead, those things happen on a regular basis
around here. I usually make a batch of this every 3 months or so in
order to keep up with demand. You only need some dried comfrey, which
you can find at my affiliate partner, and some carrier oil. I used
fractionated coconut oil here, but you can use almond, hemp seed, or
even olive oil for this.
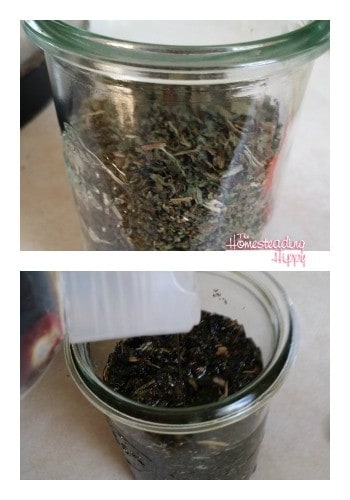
Place about 2 grams (weighed) of the dried comfrey into a clean glass jar.
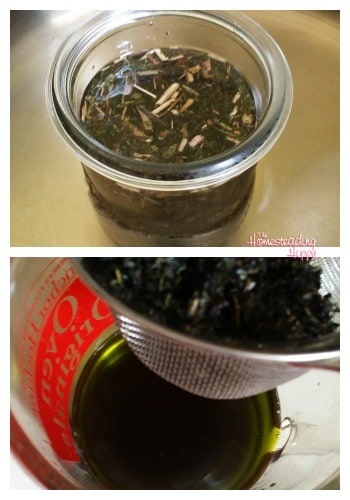
Cover the herbs with about 1 cup of oil. Carefully place in a pot
of barely simmering water and cover the jar to keep the essential oils
in. Allow to sit in the barely simmering water for 45 minutes. Don’t
allow the oil to get too hot. I use a thermometer to make sure it stays
under 100°. Allow to cool completely. For a double infused oil, drain
the oil from the root and add it to new herbs and place back in
simmering water for another 45 minutes. Personally, I have never used
double infused oil for this, but there is no reason you can’t if you
would like.
Drain the herbs from the oil using a metal strainer.
Carefully press down on the herbs to ensure all the goodness is
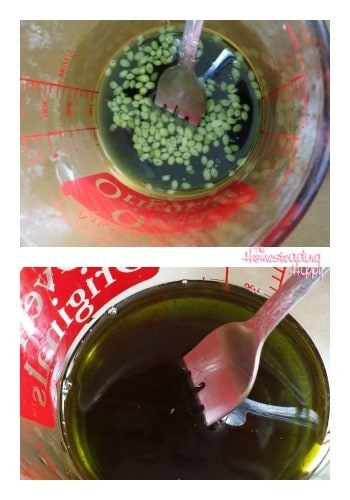
drained out of it. Put the infused oil back in barely simmering water
and add 1 tablespoon of beeswax and slowly melt together. Remove from
heat and allow to cool completely before use. Label and store in a cool,
dry place. Use within 6 months.
To use, simply apply a thin layer to bruises, sprains or owies.
You DO NOT want to use this on open skin, however, as it may
irritate the healing. This is only for surface wounds that are closed
like bruises and sprains.
Size of a pumpkin leaf: 42 cm, that’s 16.5″. Not bad for a sandy soil!
One of the problems a lot of people have is how to improve the
fertility of sandy soil. One solution is to add more organic matter
(compost, manure, wood chips), but unfortunately if you live in a hot
and humid climate the stuff you put in the soil is going to decompose
quickly, since microbial activity is so fast. That creates a serious
problem, because your poor sandy soil is not holding nutrients. You can
add fertilizers, but they are going to leech out of your soil very fast.
Because of that your fruit trees, shrubs, and vines will be yielding
poorly, and they will be susceptible to diseases and pest damage. What’s
worse, the fruits (and vegetables) of your labor will taste plain and
they will not have a lot of vitamins and minerals in them.
How can sandy soil be improved?
What you need to do is increase the capacity of your soil to hold
nutrients. Then adding fertilizers (either organic or not) will be much
more effective, because the stuff you put in your soil will actually
stay there. As I mentioned before, compost or mulch are sometimes not
the best option because they’re often decomposed very quickly. But there
is a way to permanently improve the organic matter content of your
soil. It’s called biochar. What is biochar?
Biochar is a fancy name for charcoal if it’s used as a soil amendment (to improve soil properties). The benefits of using biochar
Its main benefits are:
Significantly and permanently increasing soil Cation Exchange Capacity (CEC) — i.e. the soil’s ability to hold nutrients
Because of its high porosity it creates lot of habitats for beneficial microbes
Increased water retention
How is biochar made?
Usually biochar is made of agricultural wastes, such as stalks,
straw, and wood of no commercial value. Sometimes it is made of manure
or animal bones. If it is made of manure or bones, its immediate
fertilizing value is higher, but it will not be as permanent. Biochar
made of wood or woody organic matter should not be considered as a
source of nutrients for the soil since its purpose is not to fertilize
your plants or soil, but to create the opportunities for it to be
fertile.
It’s mainly used by farmers or gardeners who follow sustainable agriculture practices. Why should you use biochar in your garden or on your farm?
There are reasons to believe that biochar is responsible for the
existence of terra preta. It’s a type of soil that was probably created
by Native Americans in the Amazon Basin. It was created by mixing
charcoal with waste (manure, bones, food waste, human feces, broken clay
pots, etc.). How fertile is terra preta?
Researchers have measured the CEC of “fresh” biochar made from pine
sawdust pellets and pine timber ranging from 22meq to 138meq.
(Characterization and Comparison of Biochar, Herbert et al,
CalPoly2012). It is also known that as biochar ages its exchange
capacity can increase, up to an order of magnitude (10x). In 2006
researchers compared several ancient char-amended soils (terra preta
androsols) in the central Amazon with adjacent soils to which char had
not been added. The most impressive result was an androsol with an
Effective CEC of 213meq compared to adjacent soil with an ECEC of 23meq.
This same androsol, estimated to be 600 to 1000 years old, tested as
containing 9064ppm Phosphorus and 17 545ppm Calcium, vs the adjacent
soil with only 273ppm P and 115ppm Ca. (Black Carbon Increases CEC in
Soils, B Liang et al, Soil Sci. Soc. Am. J. 70:1719–1730, 2006) — Ideal Soil 2nd edition, by Michael Astera
By comparison, poor, sandy soil with little to no organic matter
would have a Cation Exchange Capacity (the ability to hold positively
charged soil nutrients) in the range 1-4.
Corn grown on soil with and without biochar. Terra Preta on your right.
Because of its unusual ability to hold nutrients, it was and still is very fertile….
It’s a remarkably fertile soil, which is rich in organic matter.
What’s so unusual about it? There are other places in the world that
have soils with high organic matter content. That’s true, but most of
those places are in much cooler climates. Because of high microbial
activity (both heat and moisture) all “normal” organic matter is quickly
decomposed, so it’s almost impossible to bring the soil up to 2%
organic matter content.
The term “organic matter” means matter containing carbon (C). What’s
unique to biochar is the fact that it’s a type of organic matter that no
living things (except for humans — i.e. if we have food poisoning) want
to eat. So if biochar is added to the soil it tends to stay there,
especially if no till agriculture is being practiced. It’s a good thing
to do if you have a lot of brush or decaying wood to clear – you might
get rid of weeds and improve your soil in the same time, changing a
problem into a solution….
What do you do if you don’t have any brush or weeds to clear?
What do you do if you can’t make charcoal?
What do you do if you don’t want to make charcoal?
The obvious solution is to buy charcoal! But that might be expensive
and usually the wood that’s used to make charcoal is acquired by cutting
the tropical jungle somewhere in Southeast Asia. That means it is not
too good for the environment…. Fortunately there’s a different type of
carbon product that microbes can’t consume.
It’s coal.
Yep, that black stuff that’s being mined from the ground. How do you make biochar to create terra preta?
Because of that we (by we I mean myself and Jacek Kobus) decided to
check how good coal mixed with horse manure is in improving properties
of the sandy soil. Jacek created an impressive pile of horse dung mixed
with culm (brown coal dust). Culm is the cheapest fraction of coal you
can buy. We bought 1 ton of culm and then mixed it with 3 parts – by
volume – of horse manure.
Biochar made the Polish way – culm (brown coal dust) mixed with horse manure.
Why does biochar research sometimes show a decrease of yields?
I mentioned before that biochar is not a source of nutrients for your
garden. The same can be said about coal. Although it contains a lot of
micronutrients and trace elements, but they are not available for
plants.
What’s more important to remember is the fact that coal or biochar
has both a high Cation Exchange Capacity and Anion Exchange Capacity.
That means it can hold all sorts of nutrients for plants very well –
that’s why you want to use it in the first place! But most of the
“place” where the nutrients can be held is initially empty, waiting to
be filled up.
Because of that, if you apply it to your garden, field, or pasture
straight away, it would suck up and hold nutrients from your soil. If
you have infertile, sandy soil, your biochar will be taking and holding
nutrients from your soil for months, making the growth of your fruit,
vegetables, and cereal less than perfect. That’s why biochar research
sometimes shows a decrease of yields after an application of biochar to
the soil. How do you charge your biochar with nutrients before applying it in the garden? Mixing biochar with manure – “the dry method”
It’s quite simple – just mix your charcoal or coal with some moist
animal manure and let it “mature” for at least 2-3 weeks. We used 1 part
coal dust to 3 parts horse manure, because that’s what was available.
You can also use chicken, pig, or cow manure. Mixing biochar with urine or another liquid in a barrel or container
Some people also put coal into a barrel, then add urine or any other
liquid fertilizer so the coal can “suck up” nitrogen, a bit of
potassium, phosphorus, and other trace nutrients that can be found in
human urine or a different fertilizer. Again, let it “rest” for at least
2-3 weeks before you apply it to the soil.
One of my readers used a similar method to prepare special biochar
for blueberries – he mixed coal dust, sawdust with water, elemental
sulfur, and ammonia sulfate to make biochar more acidic.
The results of using biochar made of coal on sandy soil? It’s actually quite impressive….
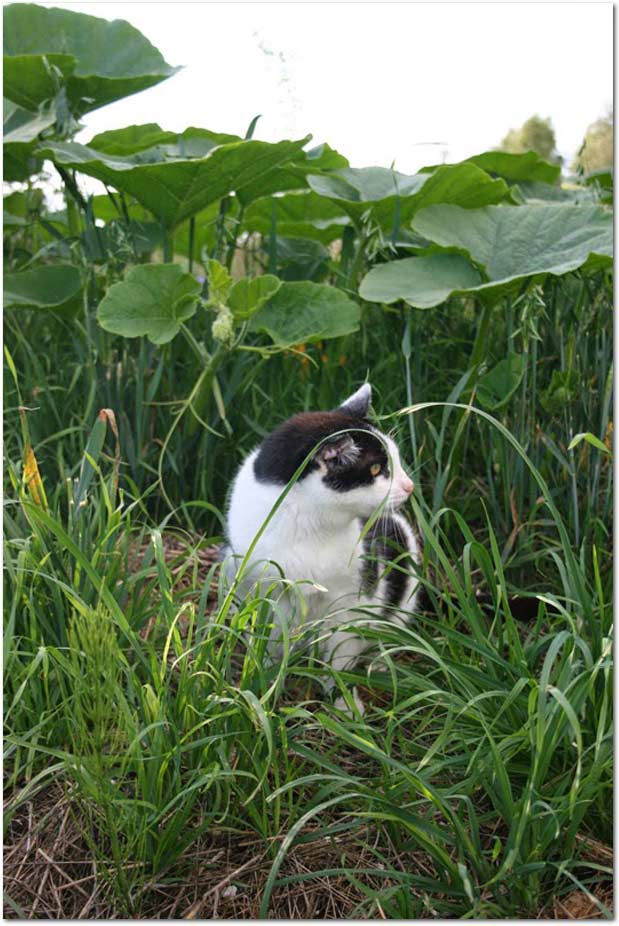
20 year old cat hunting for rodents in biochar fertilized field of pumpkins
How do you add biology to your biochar to improve the soil food web?
Before you apply “nutrient charged” biochar to the soil you can add
some beneficial organism (microbes, mycorrhizal fungi mycelium or
mycorrhizal fungi spores) that will improve the biology of your soil
even further. Using biochar as animal bedding
You can also use biochar as the bottom layer of animal bedding. It
will soak up excess liquid, tie up nutrients, and limit nitrogen loss.
You can also add some rock dust (like granite rock dust or basalt rock
dust) to your biochar. Just make sure to add some other bedding material
on top of it, like straw, wood chips, or sawdust. Should you mix biochar with rock dust or not?
If you are planning to add rock dust to your soil, you can add it to
the charcoal-manure mixture. It is especially beneficial to mix soft
phosphate rock dust with manure, because microbes from manure will help
to unlock nutrients from phosphate rock. Should you dig biochar into the soil?
I advise incorporating biochar into the soil but it will work even if
you spread it on top of your soil. Eventually it will get into the
deeper soil levels.
If you want to spread it on top of your soil in your garden it will
be good if you put some mulch made of “normal” organic matter that will
be digested by microbes. How much biochar should I add to my soil?
Biochar is one of those things that the more you have in your soil,
the better it is, but the minimum value I recommend to use in a garden
is a 1″ (2.5cm) layer on top of your soil. No matter if you dig it in or
not, you will have more than 10% organic matter content in the top
6-8″. If you add 2″, then even after the manure that you mixed with your
biochar decomposes, you will still have plenty of organic matter in
your soil. That way you can have a Cation Exchange Capacity for your
soil from 1-4 to 8-12, which is good enough to grow high quality,
nutrient-dense fruits and vegetables. Our pile made of 1 ton of coal
dust and 3x as much horse manure was enough to cover 300-400 m²
(3200-4200 square feet or 1/12 of an acre) with 5cm (2″) layer of
biochar mixed with horse manure.
After posting a bit about what permaculture is, I want to dispel some common misconceptions and tell you what it’s not:
1. Permaculture’s Not Just Gardening
Gardening in non-straight rows is only part of it! Image by amberdc.
One thing I hear often is that permaculture is just gardening in
non-straight rows. This is both funny and frustrating to me! As I
mentioned in my last post, 7 Things You Should Know About Permaculture,
permaculture is a design system that allows us to meet our needs while
enhancing ecosystem health. Gardening’s just one possible part of this
system. When we become aware of our surroundings, when we learn to work
with nature, we can build healthier and more energy-efficient buildings,
grow better and more sustainable foods, produce less pollution while
increasing personal and societal well-being. These are all possible by
applying the permaculture ethos.
2. Permaculture’s Not Just for Australians or the Tropics
Permaculture practices have been proven in both cold and temperate
climates. Natural processes may be different depending on climate and
region, but they are still observable and understandable patterns.
Permaculture design teases out these patterns and works within them in
local areas. It doesn’t matter where you are – there are universal ideas
embedded within permaculture that will allow you to design for human
needs and ecosystem health.
3. Permaculture’s Not Just For Hippies
This is probably the biggest misconception I come across. Many people
have forgotten what the hippie movement was originally about. Hippies
were protesting a system that didn’t work. While some of them protested
through the use of drugs, some embraced permaculture because they wanted
to create a new future. But today, hippies aren’t the only ones
embracing permaculture.
Permaculture attracts people from all walks of life. By Alla Guelber.
I believe the world today is ripe for change. I see how our
permaculture design courses are primarily taken by white and blue-collar
professionals who can see that things are not right and want to do
something about it. I sense that they have a desire to reframe their
degrees or work experience. A lot of them have properties they want to
manage or enhance; others are entrepreneurs who want to innovate by
starting green businesses based on permaculture principles. Change is
coming, and many of our students see the writing on the wall and want to
become drivers for that change. Are
you interested in a systems approach to problem solving? Do you want to
adapt or improve your skillset to a changing world? Are you looking to
participate in innovative and solutions-oriented programs? Why not try out permaculture for yourself?If you’re completely new to permaculture, check out our online permaculture primer, an intro course in 6 easy videos – for practically pocket change! Ready to take the plunge? You might be interested in our full Permaculture Design Certificate. Our Spring course starts this February and early bird prices are on now for a limited time!
If you’d like to read more about what permaculture is, check out my previous blog: 7 Things You Should Know About Permaculture. Feature Image from wikimedia.org
What is permaculture? For those of you who’ve only heard of
the term in passing, and ever for you seasoned “permies” who struggle to
explain this exciting (and sometimes life-changing) idea to others,
here’s the gist in 7 points:
1. Permaculture is a Design System That Uses Ecosystem Principles to Meet Human Needs
Permaculture is an ecological systems theory. As author Toby Hemenway notes,
while conventional thinking asks how we can meet our own needs,
permaculture asks the broader question of how we can meet our needs
while also taking ecosystem health into account.
Permaculture looks closely at how ecosystems work and condenses those
functions into twelve general principles. These in turn inform our
design decisions about shelter, food, water, energy, and waste
management. They also rest on two fundamental assumptions:
Humans are a part of the planet and cannot be separated from it.
Humans can be a positive force that leaves things better than we find them.
If we are willing to learn from and work with nature, we can make
smarter decisions to inform how we live. These choices can prevent the
wasteful use of fossil fuels or the unnecessary need for environmentally
and economically costly foods. They can help us avoid living in areas
prone to fires, droughts, and floods. They can help us tread more
lightly on the environment while saving us money and keeping us
healthier and happier in the long-term.
2. Permaculture Regards Humans as Part of the Solution
Human beings cannot live in a physical world without having an
impact. We consume resources, generate waste, and alter our
surroundings. But what we can do, as an ethical and responsible species,
is to optimize that disturbance. As a global industrial society, we are
very ignorant of the consequences of our actions and are causing a lot
of damage. Permaculture offers us a framework and the tools to align
our creativity with actions that can repair and regenerate both the
natural and human world.
3. Permaculture is a Way to Reframe the World
At its core, permaculture is an optimistic discipline. Research has shown that negative thoughts can shut down our prefrontal cortex
– the part of the brain we think and design with. If our mindset
constantly revolves around doom and gloom, it becomes very difficult to
find solutions to the environmental challenges we face in the
twenty-first century. By looking to the wonder and complexity of nature,
permaculture allows us to reframe problems as opportunities. In the
natural world, disturbance brings about new cycles, niches, and
possibilities for species to adapt and prosper. When we approach things
with this optimism, problems become much easier to deal with. A popular
permaculture saying:
“One never has a slug problem in the garden, but rather a duck opportunity waiting to be exploited.”
4. Permaculture is a Metric to Define Sustainability
Modern society’s metrics for success are fundamentally flawed. Did
GDP go up or down? Did quarterly results increase or decrease? Did
employment rates rise or fall? As Steven Stoll writes in the Orion
Magazine article, The Mismeasure of All Things,
a lot of these indicators tell us nothing about the things that are
truly important in life. They tell us nothing about ecosystem health and
biodiversity, of farmer livelihoods or community cohesiveness. They
offer us no advice on how to create a happier and healthier world.
In my opinion, we need new metrics to measure genuine success. Did we
sequester more carbon than we emitted? Did we leave an area more
species-rich than before? Did we grow a vibrant and thriving community?
These are the things that truly matter, because we cannot thrive as a
society without clean air and soil and community, no matter how large
the GDP becomes.
Permaculture helps us establish many of these metrics. It helps us
identify opportunities to make change and to inspire others. It promotes
actions that increase diversity, health, and balance. There’s a lot of
exciting work that can be done through the permaculture lens.
5. Permaculture is a Systems Approach to Design
It
doesn’t matter what you’re designing – permaculture’s system approach
represents a way of doing things differently. I’ve designed businesses,
community groups, houses, and even laundry systems through a systems
mindset. Permaculture design is universally applicable because it
reflects how the real world, a world of interdependence and complexity,
works. It makes available the tools for you to become aware of those
connections, always with the big picture in mind.
6. Permaculture is a Set of Solutions
I’ve often said that permaculture is just one big solutions matrix.
For any problem, there are a huge number of potential solutions.
Permaculture provides you with the principles so that you can choose
solutions that are optimized for you and your surroundings. An example
in the area of home design: What is most important – High thermal mass, high insulation , high thermal mass and insulation, or lightweight construction? The solution depends on your needs: Which one will
be most comfortable? Which uses the least energy? Which lasts the
longest? Which has the lowest embedded and operating energy? Which is
most suitable for your environment? Examples in other design areas:
It is this decision-making process, based on systems thinking and focused on optimization, that is invaluable to any project.
7. Permaculture is a Bunch of Disciplines Rolled Into One
Permaculture is engineering, physics, biology, anthropology and
architecture all rolled into one. Obviously you don’t become an expert
in all these fields just by studying permaculture, but you can gain a
solid foundation in these areas while gaining perspective on how human
beings fit on this planet. With this broad knowledge base, you can get
started designing around your life’s needs while creating positive
change.
As one of my friends once asked me, if the nuclear bomb is the most
negative thing we have ever created, what is considered the most
positive? I don’t think we really know yet because we have only started
to apply ourselves, and that is really exciting to me.
Now that you know a bit more about what permaculture is, consider
diving in deeper with one of our acclaimed permaculture courses:
Completely new to permaculture? Check out our online permaculture primer, an intro course in 6 easy videos – for practically pocket change! Ready to take the plunge? You might be interested in our full Permaculture Design Certificate. Our Spring course starts this February and early bird prices are on now for a limited time! Stay tuned for my next blog, What Permaculture Isn’t. Featured image: One of Masanobu Fukuoka’s seed balls. Picture by Herder3
I’m honored to have Justin Rhodes from Abundant Permaculture
guest posting today. Justin is a wealth of information when it comes to
sustainable chicken-keeping, and you’re going to love his tips for
putting your flock to work in the garden. He is also currently in the
thick of producing a documentary all about Permaculture Chickens. I’ve
NEVER seen anything like this– this information has been so hard to find
up until now, but Justin is making it easy to access. I’ve already donated to the Kickstarter campaign– I hope you will too! This is the kind of information that has the potential to really make a splash!
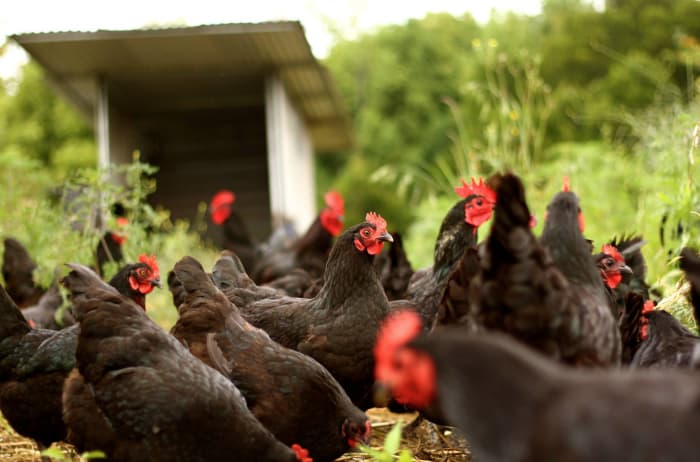
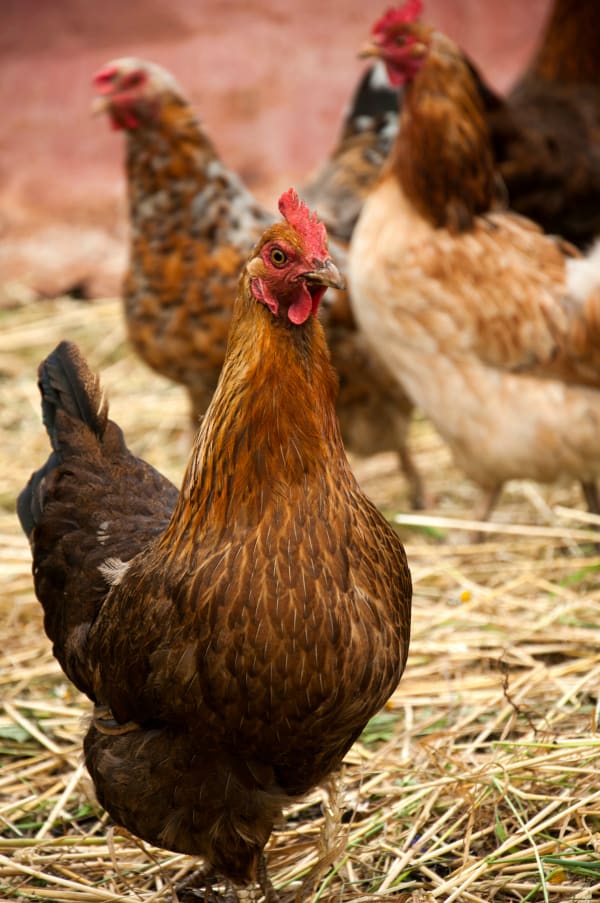
I am continually blown away by the power of chickens in the garden!
They’re such great workers, I would keep them even if couldn’t eat their
eggs or meat. Plus, they reproduce themselves, unlike any man-made
tool.
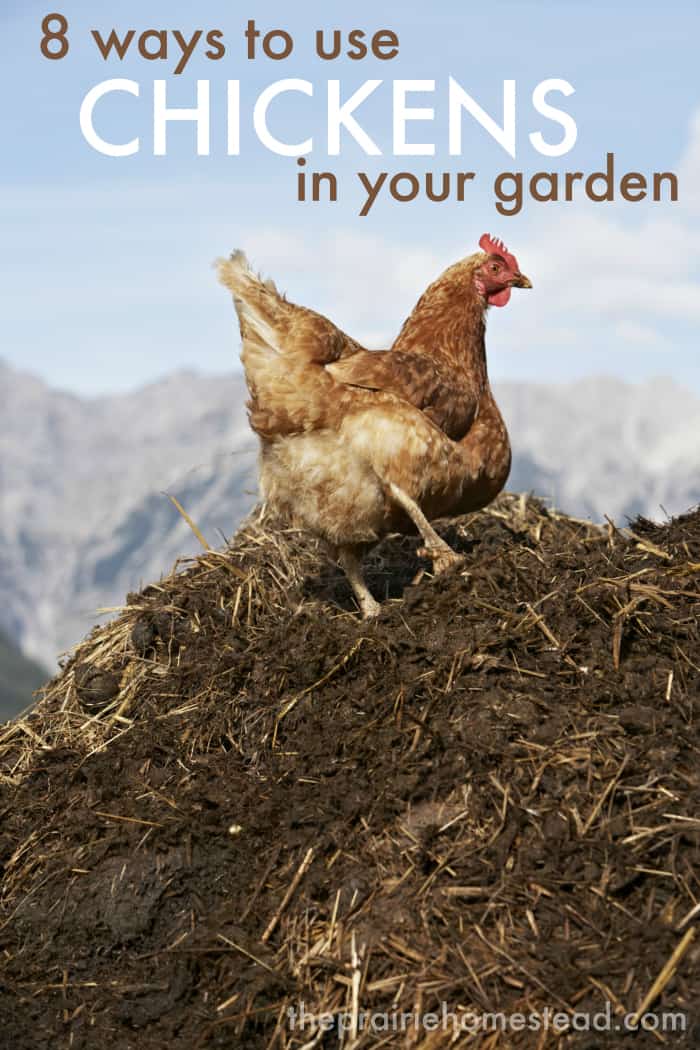
In this article, I’ll explore eight different ways you can use
chickens in the garden. You’ll discover how you can put chickens to work
by providing nitrogen for your compost pile, replacing machine tillers,
fertilizing your garden, turning compost, spreading mulch, disposing of
your garbage, controlling pests and sanitizing your orchard. Let’s go… Credit: Ingrid Pullen Photography
8 Ways to Use Chickens in the Garden
1. As a Nitrogen Source for a Compost Pile
One chicken can produce eight pounds of manure a month according to
Ohio State University. That’s about enough to compost one cubic yard of
leaves!
To make great compost, you need a carbon to nitrogen (C:N) ratio of
about 30:1. Chicken manure is very rich in nitrogen and is rated at
about (10:1). This means you won’t need much to balance it out with its
readily available counterpart; carbon materials like leaves, hay or
straw. Leaves for example, are rated at (47:1), so for every 1 pound of
chicken manure, you’ll use 45 pounds of leaves! A little goes a long way
with chickens manure! How to do it:
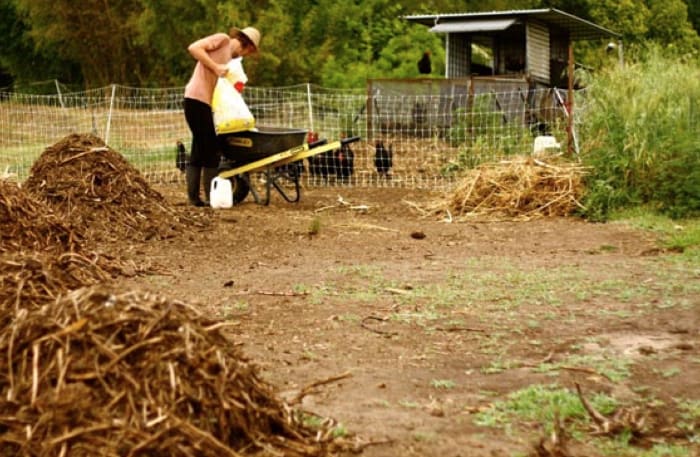
Harvest your flocks’ manure regularly and store it in a leach-proof
container until you are ready to build your pile. If you don’t want to
store poop, then you can apply the manure with the carbon material as
you go. For more information about compost building check out my article
on composting with chickens, “I Cut My Chicken Feed Bill 100%” Ingrid Pullen Photography
2. As Tillers
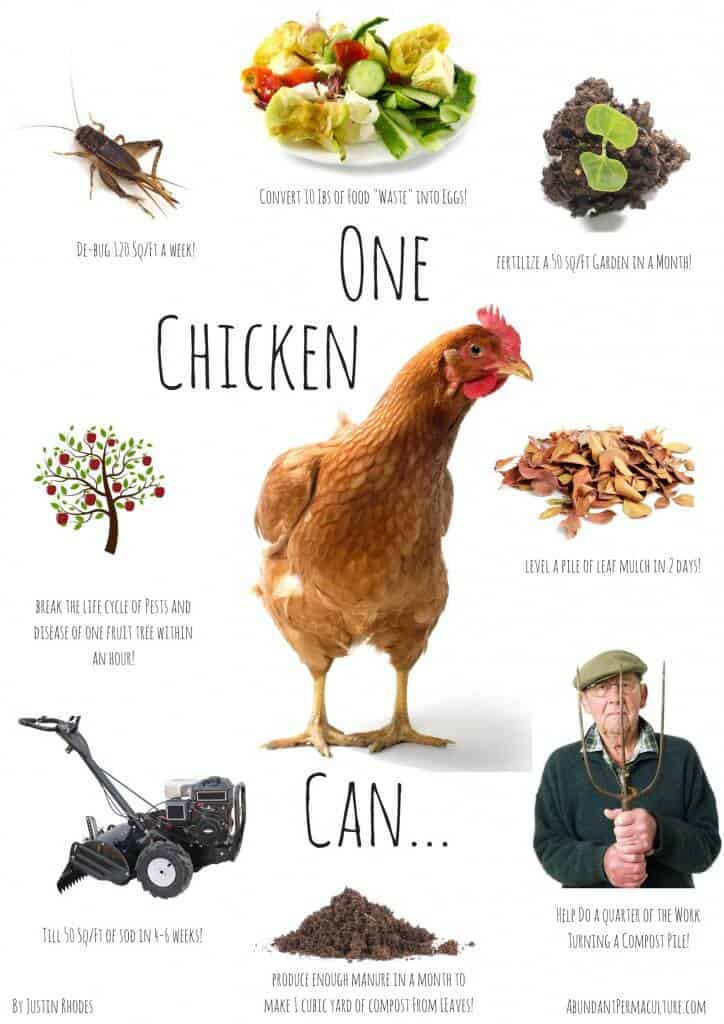
One chicken can till 50 square feet of established sod in just 4-6 weeks!
By scratching and eating practically all vegetation, chickens make
great tillers. Although they take much longer than a machine tiller,
they require no fossil fuel, they’re much quieter, and you don’t have to
do any of the work. I sold my machine tiller years ago and have been
using my chickens ever since. Based on my own experience, 1 chicken can
till about 50 square feet of reasonably short sod within 6 weeks. (Jill:
Keep in mind that chickens will also till areas you might want to keep,
so consider fencing them out if you are wanting to preserve certain
areas of vegetation or sod) How to do it:
Simple leave your flock in one place long enough! For small jobs,
like individual garden beds, I suggest a chickens tractor suited for
your particular garden design. For larger projects, I suggest mobile
housing and temporary electric netting. Feel free to estimate your
timing based on the size of you flock and garden plot on the 50 square
foot per chicken statistic.
You can see in the photo below how chickens can clear an area of vegetation: Credit: Ingrid Pullen Photography
3. As Automatic Fertilizers
One chicken can provide enough nitrogen fertilizer for a 50 square foot garden in a little more than a month.
The chickens nitrogen levels in manure isn’t just great for compost,
it’s the key ingredient to fertilizing our gardens. Based on the eight
pounds one chicken will poop in a month, the average chicken will
extract about a quarter pound a day! There’s 1.5% nitrogen in their
manure, so that’s .004 of nitrogen a day. If we’re shooting for a solid
.30 pounds of nitrogen every 100 square feet, it will take one chicken
75 days to fertilize a 100 square feet. It doesn’t sound like much, but
it adds up quickly when you have multiple chickens. At this rate, 24
chickens could fertilize 1200 square feed of garden in just 6 weeks! How to do it:
Confine your chickens to the area you want fertilized and figure
their length of stay based on the size of the area and how many chickens
you have. Be careful not to leave your chickens in one place too long
(without mulching) as you can have too much of a good thing! Credit: Ingrid Pullen Photography
4. As Compost-Turners
One chicken can help do a quarter of the work of turning a compost pile!
In order for your compost to break down, it must get oxygen. The more
air you give it, the quicker it will break down. Many gardeners make a
habit of “turning” their entire compost pile regularly when they need
some of the precious material quickly. Turning is a laborious job, but
your chickens can do at least a quarter of the work for you. I estimate
they’ll do a quarter of the work, because they won’t take down the
entire pile and they certainly won’t re-stack it for you. However, they
will take down a good chunk of it, and all you’ll have to do is turn
what they left of the pile and re-assemble what they spread out. How to do it:
Assemble your compost pile and allow it time to heat up. If contains
only fresh ingredients your chickens won’t show much interest. Once it’s
warmed up and had time to start to decompose it will be swarming with
life! If you need to protect your pile while it heats up, you can put it
in protected bin, temporarily fence it off, or keep it covered. Once
it’s had time to heat, your chickens will show great interest in the
live biota that now makes up the pile. Later, you’ll come back and
re-assemble the pile. I re-assembly and turn the piles once a week and
within 4 weeks I have finished compost.
5. As Mulch Spreaders
One chicken can level a large pile of leaf mulch within two days.
Chickens can level a pile in no time. If I want to spread mulch or
compost, I just pile the material where I need it spread and fence in my
chickens around it. My flock of 30 can easily spread a large pile of
leaves in a half a day, and one cubic yard of compost within two weeks! How to do it:
Confine your chickens around a pile of mulch or compost where you
want it spread. Leave them until the work is done! Time to spread will
depend on size of pile, material, and age of material. Older material
will have more biota and the chickens will show more interest. If your
chickens aren’t showing interest in a pile you need spread (like fresh
wood chips), try spreading their feed on the pile, so they have to
scratch for it.
6. As Garbage Disposals
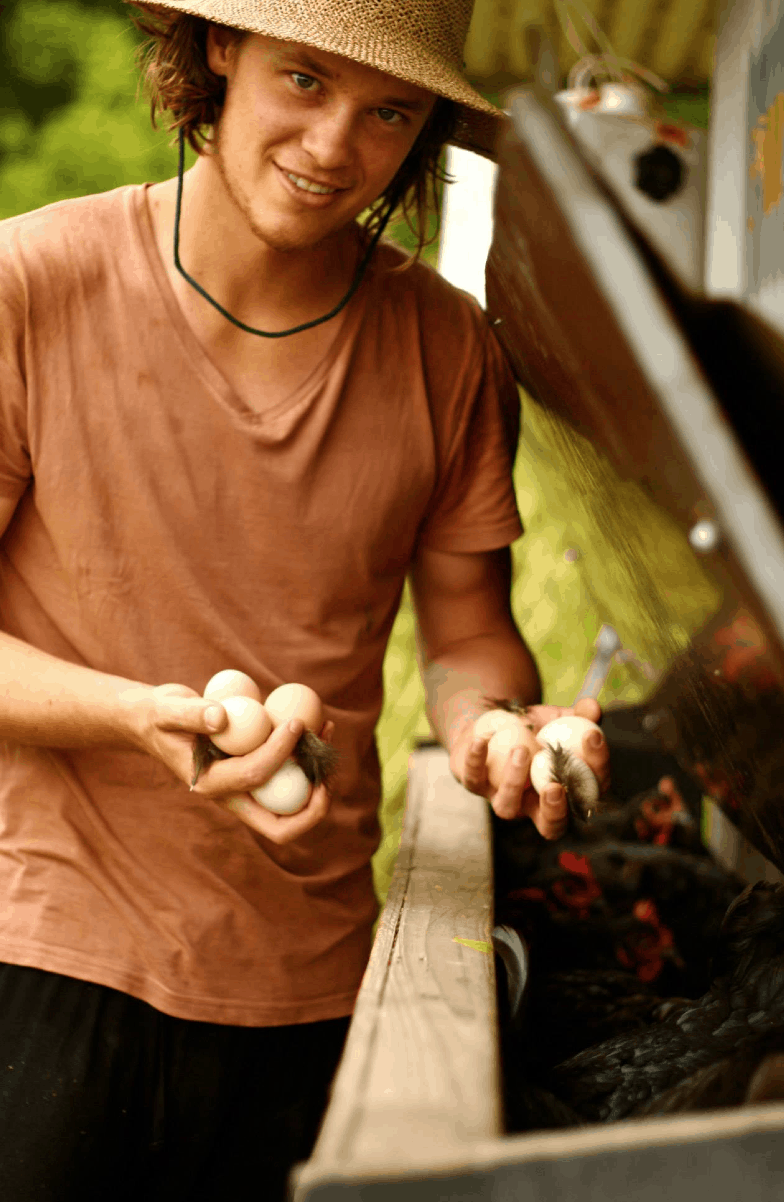
One chicken can convert up to pounds of food “waste” a month into fresh eggs and meat!
17% of what Americans throw out as “trash” is food according to the Gossamer foundation. Chickens are omnivores,
like us, and will eat practically everything we can and more! Why not
give our food scraps to our chickens and save money on trash disposal
and lessen the burden of our landfills? Based on my own experience,
chickens will easily eat a 1/4 to a 1/3 pound of food in a single day.
That means a small flock of six could eat up to 60 pounds of food
“trash” a month! (Jill: This is also one of my favorite ways to save money on chicken feed!) Credit: Ingrid Pullen PhotographyHow to do it:
Collect your food scrap in a food grade container or bucket. Chickens
will eat practically any type of food your throwing out, including
meat. If your not sure it’s safe for you chicken, try it and see what
they do. I believe they have the sense to know whether it’s good for
them or bad. You can clean up what they won’t eat or let it decompose
where it’s at.
7. As Insect Control
One chicken can easily de-bug up to 120 square feet a week!
Chickens will thrive on all kinds of insects, beetles and grubs.
They’ll snap up pretty much any thing that moves above the surface and
they’ll scratch down more than six inches in garden mulch for grubs! A
couple of years ago, I moved a flock of 15 around the pasture in 1700
square feet of mobile electric netting. Those birds easily eliminated
the bug population in that area within a weeks time. How to do it:
There are several options here. Before you plant the garden, you
could confine your chickens in a tractor or with electric net over the
area, then move them out when you start your garden. You could also free
range your birds, while protecting your garden and other areas you
don’t want them. I’ve heard of folks fencing the chickens around the
entire garden. This would work to protect the garden from any crawling
insects and the chicken manure might attract harmful slugs out of the
garden, to the chickens. You could also move the chickens around the
garden or property with a tractor or mobile netting depending the size
of your operation. Finally, you can allow them supervised time in the
garden or give them in 30 minutes to an hour before dusk. That way
they’ll have just enough time to get at the bugs, and they won’t have
any time left for your goodies!
8. As Orchard Sanitation
One chicken can de-bug an entire fruit tree within an hour, breaking the life cycle of pests and disease.
Disease and insect problems plague your typical orchard, but it
should come by no surprise that the that the chickens can help in this
area too. With some strategic timing, chickens can significantly boost
orchard production! Two years ago some of my friends ran their flock
through my granny’s abandoned/low production orchard. That next summer,
we harvested so many apples, we’re still enjoying the applesauce! How to do it:
Typical fruit trees don’t need a lot of nitrogen so you’ll wanted to
limit the birds time around them and use some strategically timed
planning. I suggest running the chickens through during the spring when
the adult worms are coming out to lay their eggs. I would run the flock
through again in the Autumn to eat the fallen fruit that that insects
might use as housing throughout the winter. Credit: Ingrid Pullen Photography
(Want the printable version of this poster, for free? CLICK HERE. A HUGE thanks to Justin and Abundant Permaculture for creating this for Prairie Homestead readers!)
Don’t forget to head over and check out the upcoming Permaculture Chickens film–
I’m stoked to be a part of this project by donating, and am counting
down the days until it’s released. This is just the kind of information
we need more of to empower more people towards homesteading and
self-sufficient living. About Justin:
Once Justin discovered self sustainable farming around
2004, he has enjoyed many years of practicing “beyond organic” and
permaculture methods on his 4th generation, 75 acre, family farm near
Asheville NC.
Justin trained under the highly accredited
Geoff Lawton of PRI Australia for his Permaculture Design Certificate
(PDC) and has trained under popular authors Joel Salatin and Pat
Foremen. He’s passionate about teaching from his own homestead on the
chicken systems essential to more sustainable living.
With a great combination of business and
permaculture skills, Justin is well positioned to deliver high quality
educational films of this nature.